在本教程中,我们将向您展示如何安装 Apache 在 Ubuntu 14.04 上。 对于那些不知道的人, Apache 是一个 HTTP 网络服务器,使用最广泛。 它在 Web 浏览器请求时提供网页。 当您在 Web 服务器上键入 URL 并按 Enter,您在屏幕上看到的页面很可能是由 Apache 网络服务器。
本文假设您至少具备 Linux 的基本知识,知道如何使用 shell,最重要的是,您将网站托管在自己的 VPS 上。 安装非常简单。 我将向您展示分步安装 Apache 在 Ubuntu 14.04 服务器上。
先决条件
- 运行以下操作系统之一的服务器:Ubuntu 14.04,以及任何其他基于 Debian 的发行版,如 Linux Mint。
- 建议您使用全新的操作系统安装来防止任何潜在问题。
- 对服务器的 SSH 访问(或者如果您在桌面上,则只需打开终端)。
- 一种
non-root sudo user或访问root user. 我们建议充当non-root sudo user,但是,如果您在充当 root 时不小心,可能会损害您的系统。
安装 Apache 在 Ubuntu 14.04 上
步骤 1. 首先,确保所有软件包都是最新的。
apt-get update apt-get upgrade
步骤 2. 安装 Apache Ubuntu 14.04 上的网络服务器。
我们将安装 Apache 使用 apt-get,它是 ubuntu 的默认包管理器:
apt-get install apache2 apache2-utils
开始 Apache 并将其添加到系统启动时自动启动,使用:
service apache2 start
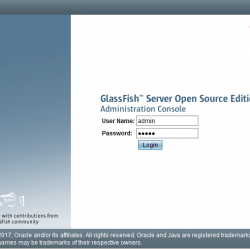
您可以验证 Apache 通过打开您喜欢的网络浏览器并输入 URL 来真正运行 https://your-server's-address,如果已安装,那么您将看到:
配置 Apache (单主机)
我们现在将配置 Apache 通过打开主配置文件并相应地编辑 ServerName 和 ServerAdmin 行:
nano /etc/apache2/sites-available/000-default.conf
<VirtualHost *:80> # The ServerName directive sets the request scheme, hostname and port that # the server uses to identify itself. This is used when creating # redirection URLs. In the context of virtual hosts, the ServerName # specifies what hostname must appear in the request's Host: header to # match this virtual host. For the default virtual host (this file) this # value is not decisive as it is used as a last resort host regardless. # However, you must set it for any further virtual host explicitly. #ServerName www.example.com ServerAdmin [email protected] DocumentRoot /var/www/html # Available loglevels: trace8, ..., trace1, debug, info, notice, warn, # error, crit, alert, emerg. # It is also possible to configure the loglevel for particular # modules, e.g. #LogLevel info ssl:warn ErrorLog ${APACHE_LOG_DIR}/error.log CustomLog ${APACHE_LOG_DIR}/access.log combined # For most configuration files from conf-available/, which are # enabled or disabled at a global level, it is possible to # include a line for only one particular virtual host. For example the # following line enables the CGI configuration for this host only # after it has been globally disabled with "a2disconf". #Include conf-available/serve-cgi-bin.conf </VirtualHost>
现在,我们可以重新启动 Apache 以便发生更改:
service apache2 restart
现在您可以创建/上传您的网页内容到 HTML 目录 Apache. (请记住用您的主页 index.html 替换现有的 index.html 文件)。
配置 Apache (多主机)
如果您想托管多个网站,请打开主配置文件,复制现有的虚拟主机条目并将其粘贴在其下方。 然后相应地编辑 ServerName、ServerAdmin 和 DocumentRoot 行。
nano /etc/apache2/sites-available/000-default.conf
或者,您可以复制以下条目并进行相应的编辑:
<VirtualHost *:80> ServerAdmin [email protected] DocumentRoot /var/www/site1 ServerName site1.com ServerAlias www.site1.com ErrorLog ${APACHE_LOG_DIR}/error.log CustomLog ${APACHE_LOG_DIR}/access.log combined </VirtualHost> <VirtualHost *:80> ServerAdmin [email protected] DocumentRoot /var/www/site2 ServerName site2.com ServerAlias www.site2.com ErrorLog ${APACHE_LOG_DIR}/error.log CustomLog ${APACHE_LOG_DIR}/access.log combined </VirtualHost>
我们现在必须为刚刚配置的站点 site1 和 site2 创建目录。
mkdir -p /var/www/site1 mkdir -p /var/www/site2
现在,我们可以重新启动 Apache 以便发生更改:
service apache2 restart
恭喜! 您已成功安装 Apache. 感谢您使用本教程安装 Apache Ubuntu 14.04 系统中的 Web 服务器。 如需更多帮助或有用信息,我们建议您查看 官方 Apache 网站.